Even if you’ve never opened a tin of house paint before in your life, a professional finish to your painting is easily achievable. Just follow a few simple rules, and make sure you’ve got the right tools for the job. With a little colour confidence you can transform your house into a stylish home.
Shop Clever
Once you have a colour in mind, make sure you purchase the correct type of paint. If your project involves decorating a kitchen or bathroom, you will need to buy products specifically made to withstand moist environments. Handily named kitchen or bathroom paint, this is humidity-resistant and some protect against mildew too. The finish, ranging from matt to gloss with some in-between, is also key. Matt emulsion paints will hide an uneven surface better than vinyl matt, satin or glossier finishes, though the light reflecting quality of these means they give a warmer feel to a room, and may also be easier to wipe clean. Areas more likely to take daily punishment such as skirting boards and door frames are best painted with a durable gloss paint which can be washed down periodically.
Tool Time
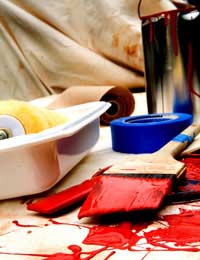
Many words have been written on the subject of painting tools, and while it’s true that a large scale interior decorating project will require a lengthy list, the amateur painter’s tool box need not burst at the seams with gadgets. The most important pieces of equipment are as follows:
- The correct number of tins of paint
- Dust sheets
- Sandpaper
- A sturdy stepladder
- A roller with tray
- A range of good quality brushes
- Primer
- White spirit
- A damp cloth
- Masking tape
Be Prepared
Preparing your surface before you paint will pay dividends. Remove dirt by wiping surfaces with a weak detergent and warm water solution, making sure you tackle any imperfections (cracks etc) before you prise open your first tin. Glossy surfaces should be smoothed down with sandpaper to create an even finish, and if you are experimenting with wood stain, rather than house paint, remember that wooden surfaces too, will require a little preparation.
Don’t be tempted to try to paint around objects – taking a thorough approach means removing any obstacles before you start – the finished project will be infinitely better for it. Any objects that cannot be removed from the room should be well covered. Paint will surprise you by getting absolutely everywhere! Masking tape is a versatile tool. Use it to protect fittings, and to define edges. One slip of an unsteady hand can ruin a smooth edge, but masking tape will prevent any such mishaps. DIY stores stock special painting or decorating tape which is ideal for painted surfaces. Also, keep a damp cloth to hand to quickly wipe up any accidental spills, being careful to clean off any excess so that you don’t cause smears.
Brush Strokes
It is not essential to use primer prior to painting, but it will certainly produce a better result and prevent you from having to paint so many coats. Unless you have a great deal of time and patience, you will probably use a combination of brushes and a roller to apply your chosen colour. Begin by stirring the paint well, then use a brush cover the areas that cannot be accommodated by your roller, such as corners and edges. Adopt a good painting technique to conserve product and produce a more professional finish. Remove excess paint from your brush and apply in more than one direction so that you don’t end up with a stripy result.
Roll Up
The advantage of using a roller is that it’s quicker than using a brush, and can produce a more even finish. Use the ridged section of your roller tray to remove excess, then paint a large zigzag on your wall, covering over it in different directions to even out the paint. Correctly loaded with colour, your roller should be able to cover an area of around four feet square with each application.
Squeaky Clean
Clean your brushes and roller immediately after use. Clean water will remove emulsion paint, but you’ll need something stronger, such as white spirit, to wash away gloss or wood stain. Properly cared for, a good set of paint brushes will last you a lifetime.
As with all decorating, the more time you spend painting, the better your technique. Just the excuse you need to get started on the rest of your home!


Leave A Comment